Introduction: What is GeoGebra and How Does It Work?
Background Information About GeoGebra
GeoGebra is dynamic mathematics software for schools that joins geometry, algebra, and calculus.
On the one hand, GeoGebra is an interactive geometry system. You can do constructions with points, vectors, segments, lines, and conic sections as well as functions while changing them dynamically afterwards.
On the other hand, equations and coordinates can be entered directly. Thus, GeoGebra has the ability to deal with variables for numbers, vectors, and points. It finds derivatives and integrals of functions and offers commands like Root or Vertex.
These two views are characteristic of GeoGebra: an expression in the algebra window corresponds to an object in the geometry window and vice versa.
GeoGebra’s User Interface
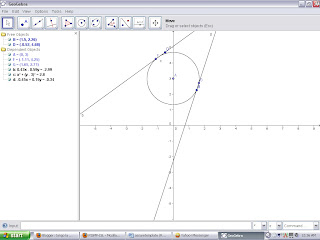
GeoGebra’s user interface consists of a graphics window and an algebra window. On the one hand you can operate the provided geometry tools with the mouse in order to create geometric constructions on the drawing pad of the graphics window. On the other hand, you can directly enter algebraic input, commands, and functions into the input field by using the keyboard. While the graphical representation of all objects is displayed in the graphics window, their algebraic numeric representation is shown in the algebra window.
The user interface of GeoGebra is flexible and can be adapted to the needs of your students. If you want to use GeoGebra in early middle school, you might want to hide the algebra window, input field, and coordinate axes and just work with the drawing pad and geometry tools. Later on, you might want to introduce the coordinate system using a grid to facilitate working with integer coordinates. In high school, you might want to use algebraic input in order to guide your students through algebra on into calculus.
Drawing Geometric Figures and Other Objects
Preparations
- Hide the algebra window and coordinate axes (View menu).
- Show the coordinate grid (View menu).
Drawing pictures with GeoGebra
Use the mouse and the following selection of tools in order to draw figures on the drawing pad (e.g. square, rectangle, house, tree,…).
| | New point |
| | Move |
| | Line through two points |
| | Segment between two points |
| | Delete object |
| | Undo / Redo buttons |
| | Move drawing pad |
| | Zoom in / Zoom out |
Square Construction
In this activity you are going to use the following tools. Make sure you know how to use each tool before you begin with the actual construction of the square:
| | Segment between two points |
| | Polygon |
| | Perpendicular line |
| | Show / hide object |
| | Circle with center through point |
| | Move |
| | Intersect two objects |
|
|
|
Construction process
- Draw segment a = AB between points A and B
- Construct perpendicular line b to segment AB through point B
- Construct circle c with center B through point A
- Intersect circle c with perpendicular line b to get intersection point C
- Construct perpendicular line d to segment AB through point A
- Construct circle e with center A through point B
- Intersect perpendicular line d with circle e to get intersection point D
- Create polygon ABCD.
Hint: Don’t forget to close the polygon by clicking on point A after selecting point D. - Hide circles and perpendicular lines
- Perform the drag test to check if your construction is correct


